1. Introduction
Code signing in iOS refers to the process of digitally signing an app's executable code to ensure its authenticity and integrity.
During feature development, developers usually do not have to worry about code signing because Xcode handles the complicated work. Most of the time, we build and run the app on simulators that do not require special code signing settings.
However, distributing the app requires code signing. While working locally, you can rely on the "Automatically manage signing" option in the project settings. But, this option is not sufficient for medium/large-scale teams. Problems arise when integrating the distribution with CI/CD. You cannot log into your developer account on CI runners, and even if you could, it would be considered a security risk.
This article focuses on how to make code signing work in a CI/CD environment.
2. Background
2.1. Distributing an App
In this article, "distributing an app" refers to the process of converting the code base of a project into an .ipa file that can be sent to a distribution channel. Such a channel could be:
- TestFlight/App Store (for those enrolled in the Apple Developer Program)
- Third-party channels (such as Firebase App Distribution, Visual Studio App Center, etc.) or in-house channels (for those enrolled in the Apple Developer Enterprise Program)
To obtain the .ipa, a developer must do the following:
- Step 1: Archive the project. This can be done by selecting Products > Archive in Xcode, or by running
xcodebuildwith thearchiveaction. The output of this step is an.xcarchivebundle. - Step 2: Export this
.xcarchiveto the.ipa. This step is done by runningxcodebuildwith the-exportArchiveoption. If you are using Xcode, you can chooseDistribute Appand follow some additional steps to obtain the.ipaor even upload it to TestFlight/App Store.
In the two steps mentioned above, the code signing process occurs during step 1. In fact, code signing is also involved when we build the project. In the Xcode build/archive logs, you can locate the code signing step at the very end.
$ /usr/bin/codesign --force --sign ECED04E29B6BF995A54ED871F657D8CB0AEDC3F6 ......
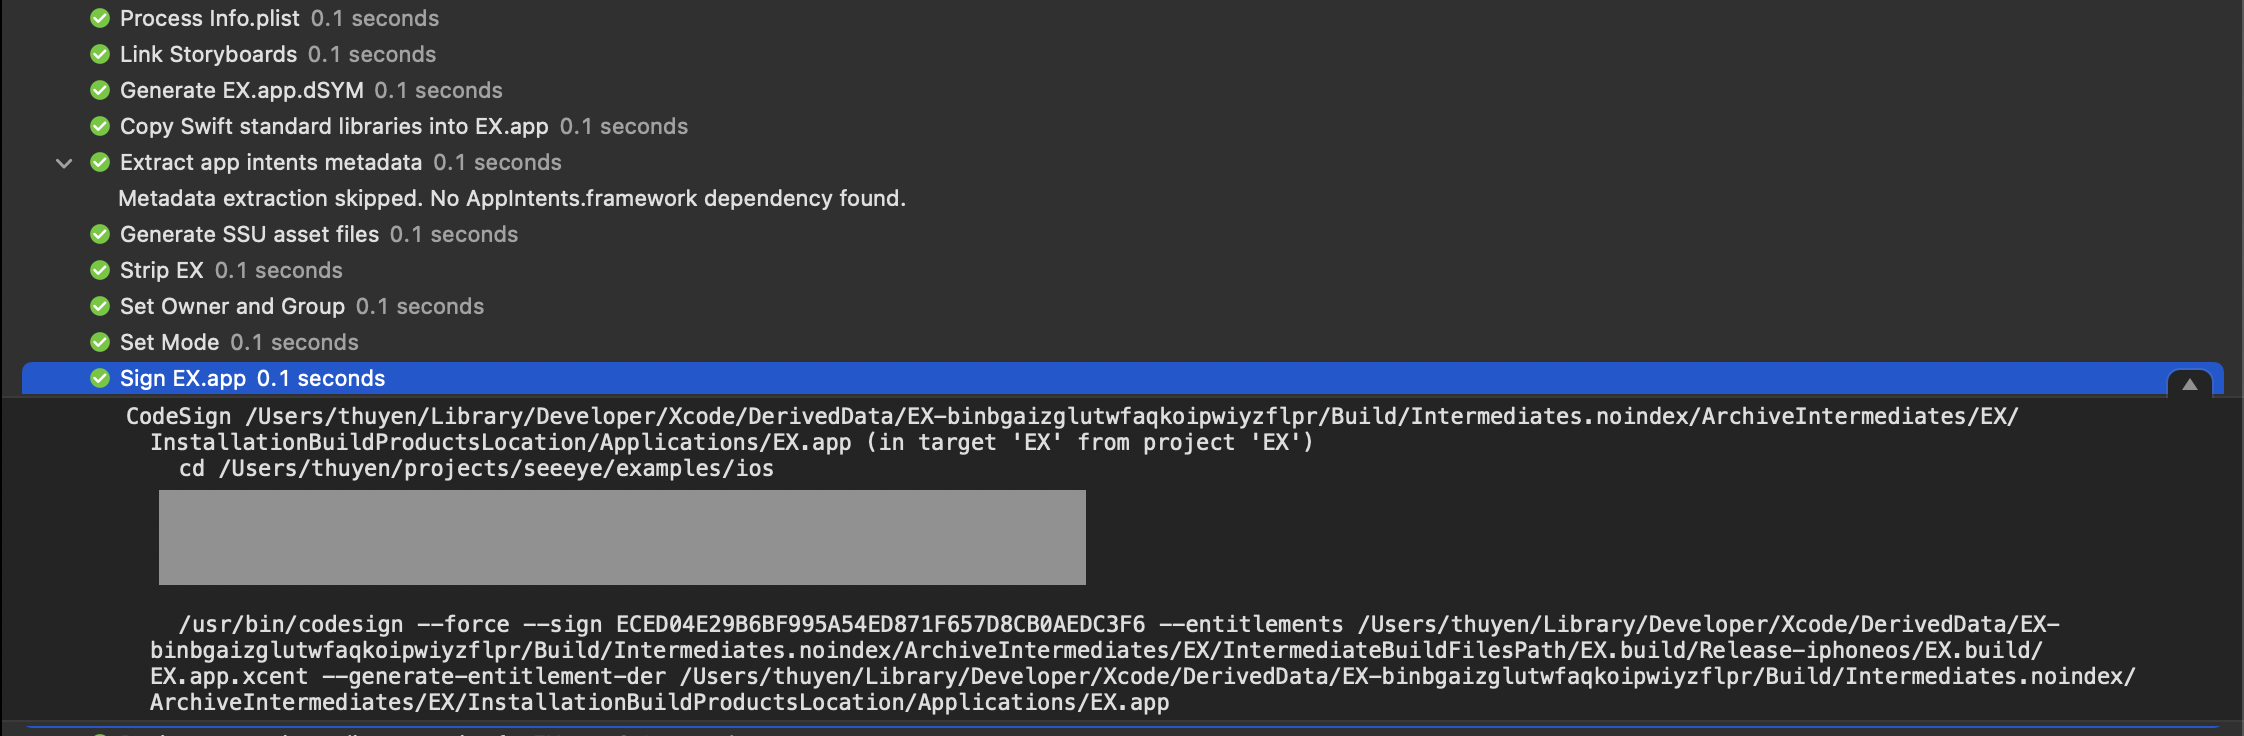 Figure 2.1.1: The
 codesign step in Xcode build/archive logs.
Even when we perform a normal debug build (for simulators), Xcode still executes this step. In this case, you should see the log stating Signing Identity: "-”. This implies that Xcode performs ad-hoc signing, which does not use any identities at all.
2.2. Code Signing Components
Code signing requires two essential components:
- A certificate (associated with a private key), which is stored in Keychain. Sometimes, the term "identity" is used to refer to the private key (similar to "identity" in SSH). The "code sign identity" in Xcode build settings refers to the identity (stored in Keychain) being used for the signing process.
- A provisioning profile, which indicates which apps to sign (based on the app ID), and who is allowed to sign (ie. those with the private key corresponding to the certificate). The provisioning profile must match the given certificate. Therefore, if we update the certificate for code signing, the corresponding profile must also be regenerated.
When packaging the app, Xcode searches for a matching provisioning profile under~/Library/MobileDevice/Provisioning Profiles. Therefore, importing a provisioning profile generally involves copying that.mobileprovisionfile to this directory.\
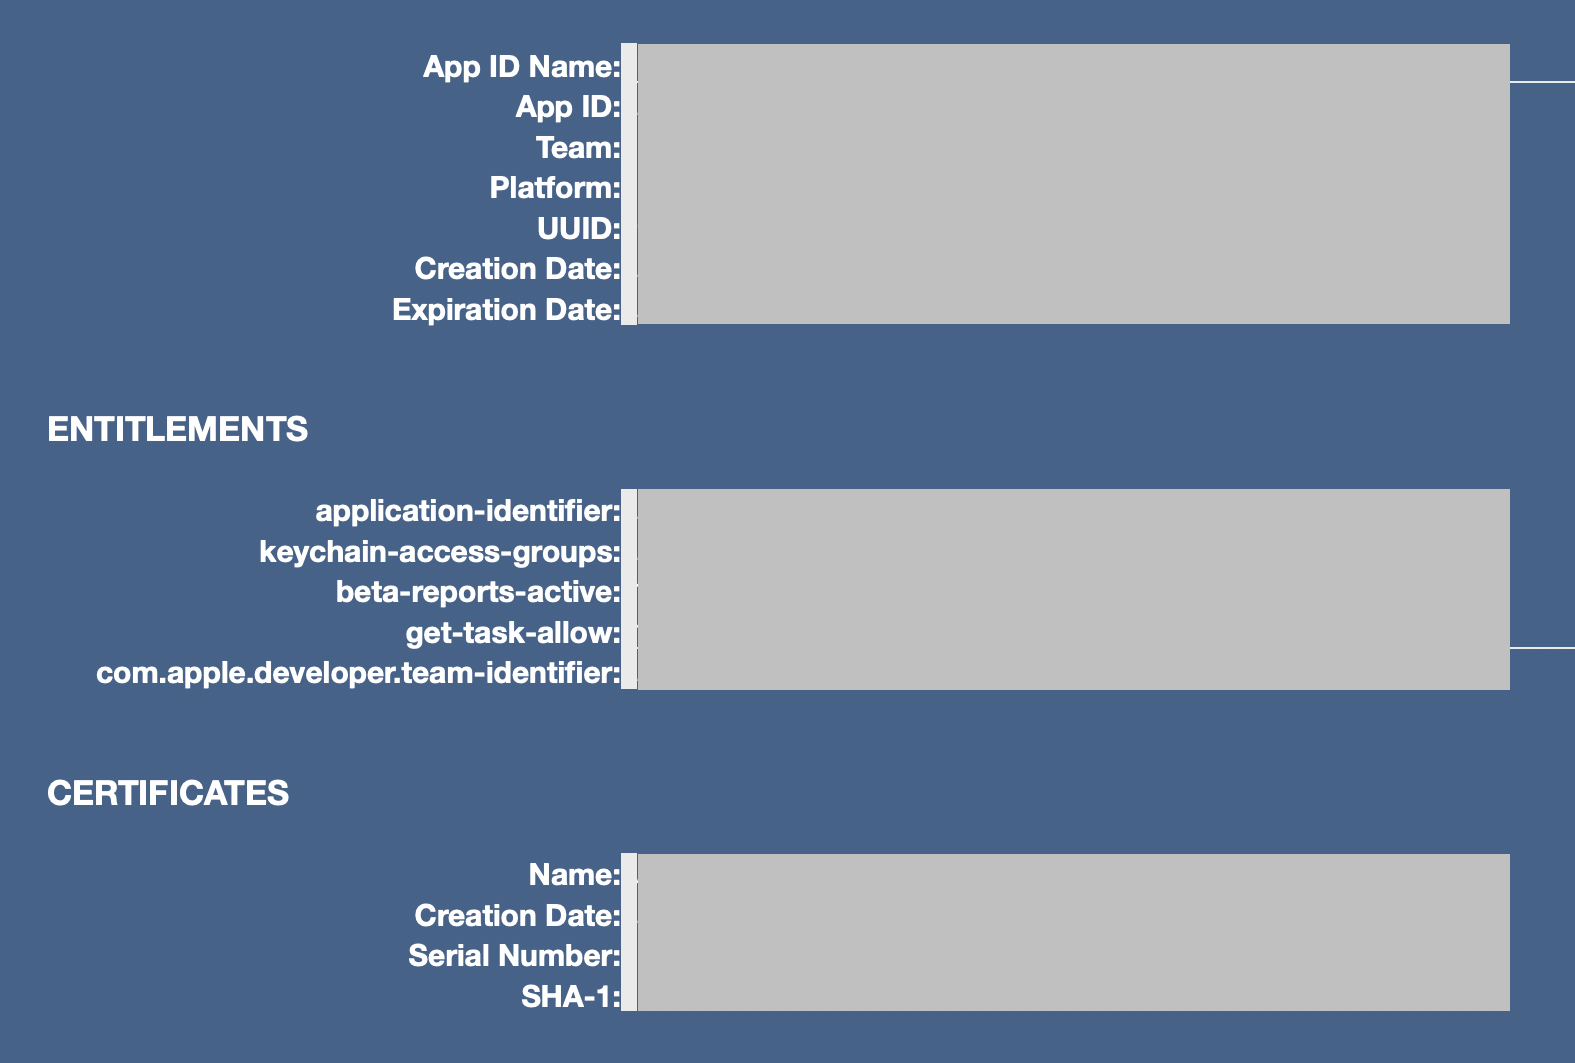 Figure 2.2.1: Previewed data of a provisioning profile.
To archive successfully, the corresponding build settings must be configured properly.
CODE_SIGN_IDENTITY = <identity name or uuid> // Ex: Apple Distribution
DEVELOPMENT_TEAM = <team id>
PROVISIONING_PROFILE_SPECIFIER = <name or uuid>
3. Demystifying Code Signing
3.1. The Role of Keychain
Code signing uses the MacOS keychain to store and manage cryptographic keys and certificates.
According to the codesign man page:
To be used for code signing, a digital identity must be stored in a keychain that is on the calling user's keychain search list.
You can find those identities under the Certificates tab in Keychain Access.
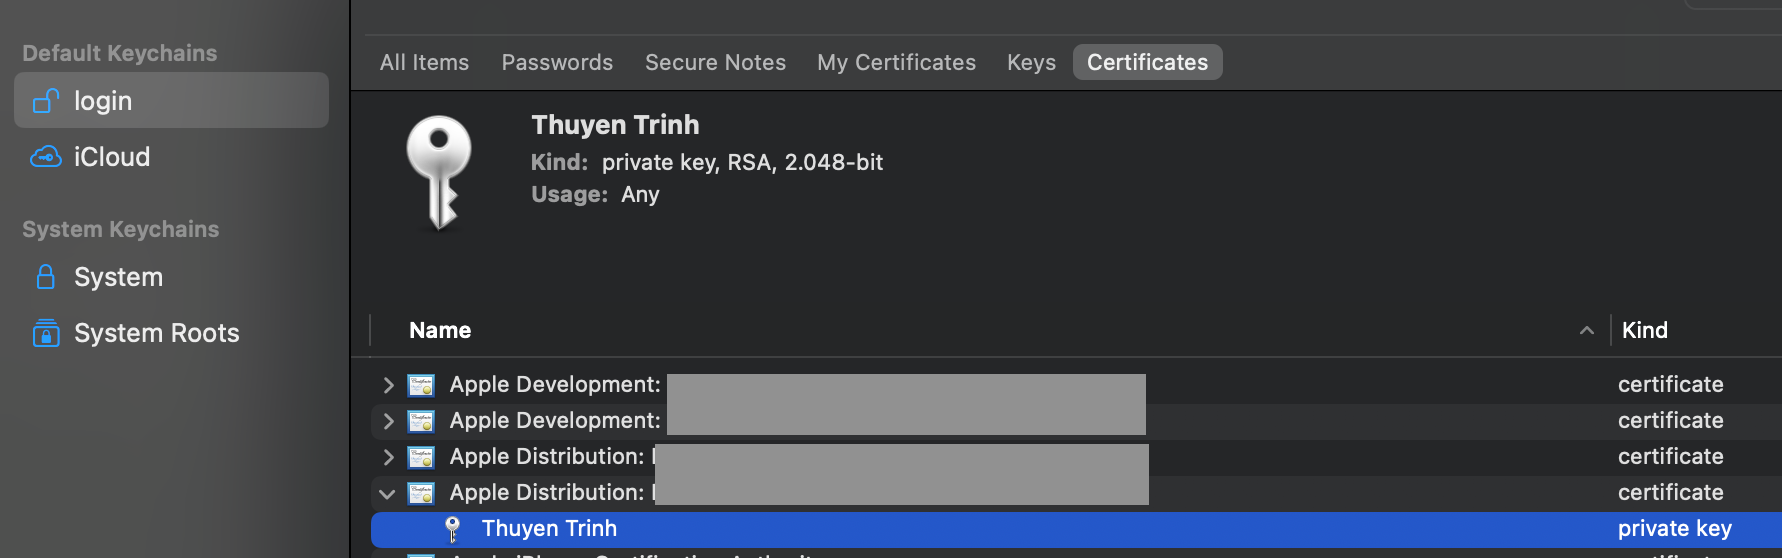 Figure 3.1.1: Private key of a certificate in Keychain Access.
By default, Xcode automatically manages certificates according to your developer account. However, there may be cases where you need to import a certificate to Keychain. For instance, if the certificate was created by another engineer, it may not be synchronized with Xcode managed certificates. Another example is when your developer account is not logged in, which is often the case for CI/CD execution.
To import an identity to a keychain, simply double click on the .p12 file and enter the password (if required). Alternatively, you can run the security import command.
$ security import <path/to/p12> -P <cert-passphrase>
3.2. Keychain Prompt
When code signing is attempted, a prompt may appear asking for permission to access keychain items. The codesign awaits users’ action on the prompt.
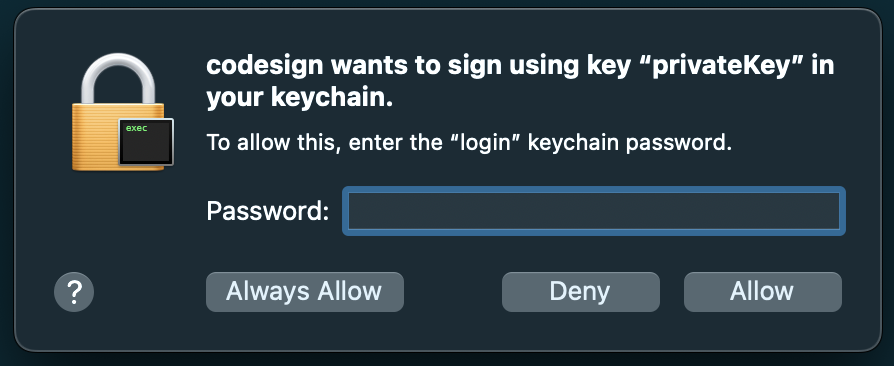 Figure 3.2.1: Keychain prompt asking for permissions to access keychain items.
If choosing “Always Allow”, the prompt will not display again. Once this option is selected, you can find codesign being whitelisted under the Access Control settings of the corresponding identity in the Keychain Access (right-click on the private key, choose “Get Info”, and navigate to the “Access Control” tab).
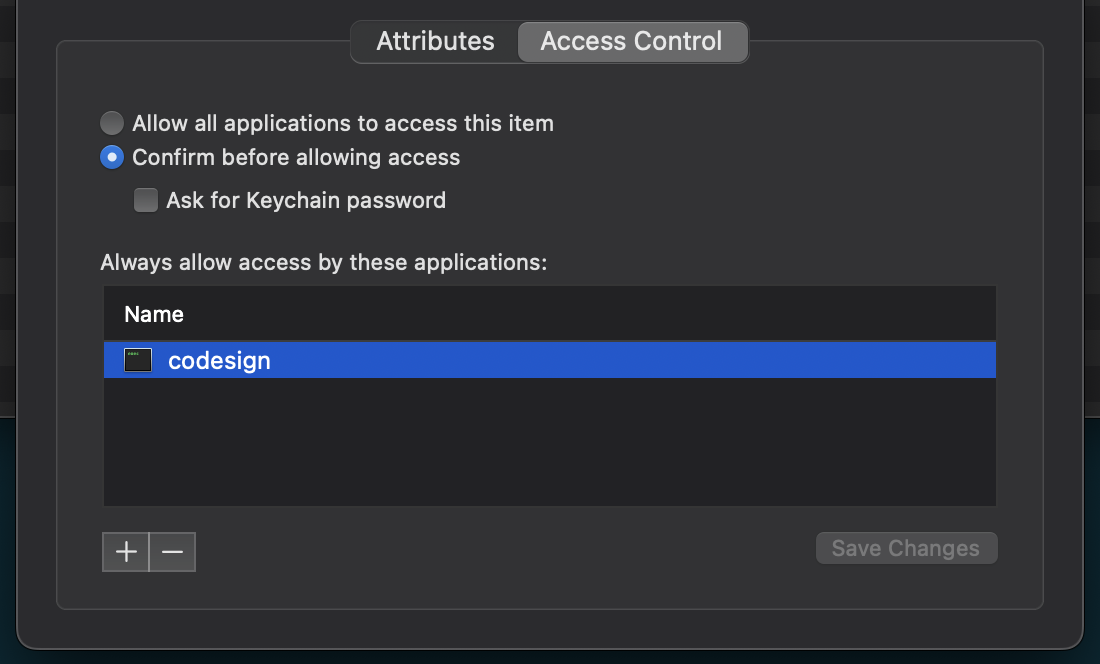 Figure 3.2.2: `codesign` in the whitelist
When we remove codesign from this whitelist, archiving the app will trigger the prompt again.
3.3. Bypassing the Prompt
The main question is: "How to suppress the prompt without using a GUI?”
To the best of my knowledge, the security CLI does not offer a direct way to grant access to a Keychain identity. Nevertheless, when importing a certificate to a Keychain using the security CLI, we can set the whitelist using the -T option.
$ security import <path/to/p12> -P <passphrase> -T /usr/bin/codesign
After running the above command, you will notice that codesign is added to the whitelist under the Access Control settings of this specific identity (see: Figure 3.2.1).
4. Solution for CI/CD
4.1. Fastlane Match
A common choice for code signing solution on CI is Fastlane Match. With this solution, code signing identities and profiles are shared across your team using various storage options such as Git repo, Google Cloud, Amazon S3. Those files are securely encrypted with a passphrase.
While this is a powerful tool, it introduces additional maintenance costs. First, you need to align yourself with Fastlane ecosystem. Second, when using a Git repo for Fastland Match, there might be some concerns when scaling for different projects. Having separate repos for N projects, each for each project, would be too many to maintain. Whereas, if we use a centralized repo for certificates and profiles, access control would be a problem. For instance, an engineer should have access to project A only, not project B. Then there is no trivial way to set up the access control this way (given that certificates and profiles of project A and B are stored in the same Git repo).
It would be great if Fastlane Match supports storing certificates and profiles directly in a directory inside the project repo. In that scenario, the certificates and profiles are encrypted and committed to the project repo, where they are utilized.
4.2. Handling Code Signing on CI
From what we have discussed in section (3), we can easily unveil the core logic that handles the code signing in Fastlane Match. Let’s create our own tool that handle code signing process.
Assume that you already have valid certificates and profiles necessary for archiving the app. It is now up to you to decide how and where to store those files.
Below are the general instructions for CI/CD setup. The provided steps are in Bash. You may rewrite the logic in your preferred language.
Step 1: Prepare a custom keychain
First, create a keychain. By having a dedicated keychain, it's easier to do the cleanup. Also, you can avoid compromisising the login password (if using the login keychain).
Then, you need to add this keychain to user’s search list.
To suppress the prompt asking for keychain password when importing certificates, we unlock the keychain in advance.
# Create keychain
$ security create-keychain -p <keychain-password> cicd
# Add to user's search list
$ security list-keychains -d user -s $(security list-keychains -d user | sed -e s/\"//g) cicd
# Unlock keychain
$ security unlock-keychain -p <keychain-password>
Step 2: Import certificates and provisioning profiles
Import the certificates with codesign being whitelisted, and copy the provisioning profiles to the dedicated directory.
# Import certificate
$ security import <path/to/p12> -P <cert-password> -k cicd -T /usr/bin/codesign
# Copy provisioning profile
$ cp <path/to/profile> "~/Library/MobileDevice/Provisioning Profiles/cicd.mobileprovision"
Step 3: Build/archive the project
Step 4: Dispose keychain if no longer in use
Delete the keychain. The imported certificates will be disposed along the way.
Optionally, you can delete the provisioning profiles that were copied earlier.
$ security delete-keychain cicd
5. Conclusion
In this blog post, we've delved into the crucial role of code signing in app distribution. We've examined the involvement of Keychain in the code signing process and explored how the security CLI can be utilized to bypass certain logic during CI/CD execution.
Code signing has often posed challenges for developers, but with a deeper understanding, it no longer be a mysterious topic. By implementing the proposed solution, you can ensure smooth code signing on CI without heavy reliance on third-party tools like Fastlane.